Migrating a Website Without Losing Rankings: Audit Before, During, and After
A plain-English guide to protecting your search rankings through a website migration — what to audit, what to fix, and how to verify nothing broke on launch.
# Migrating a Website Without Losing Rankings: Audit Before, During, and After
Redesigning or moving a website is one of the most common ways small businesses accidentally destroy months — or years — of SEO progress. Traffic drops. Rankings disappear. Phone calls slow down.
The problem usually isn't the new design. It's the migration itself. Redirect failures, lost page titles, stripped structured data, slower load times — all preventable, if you catch them early.
This guide gives you a concrete framework: what to audit before you migrate, what to verify during, and how to confirm nothing broke after launch. It's written for site owners who want a real checklist, not a lecture on HTTP status codes.

Why Migrations Break Rankings
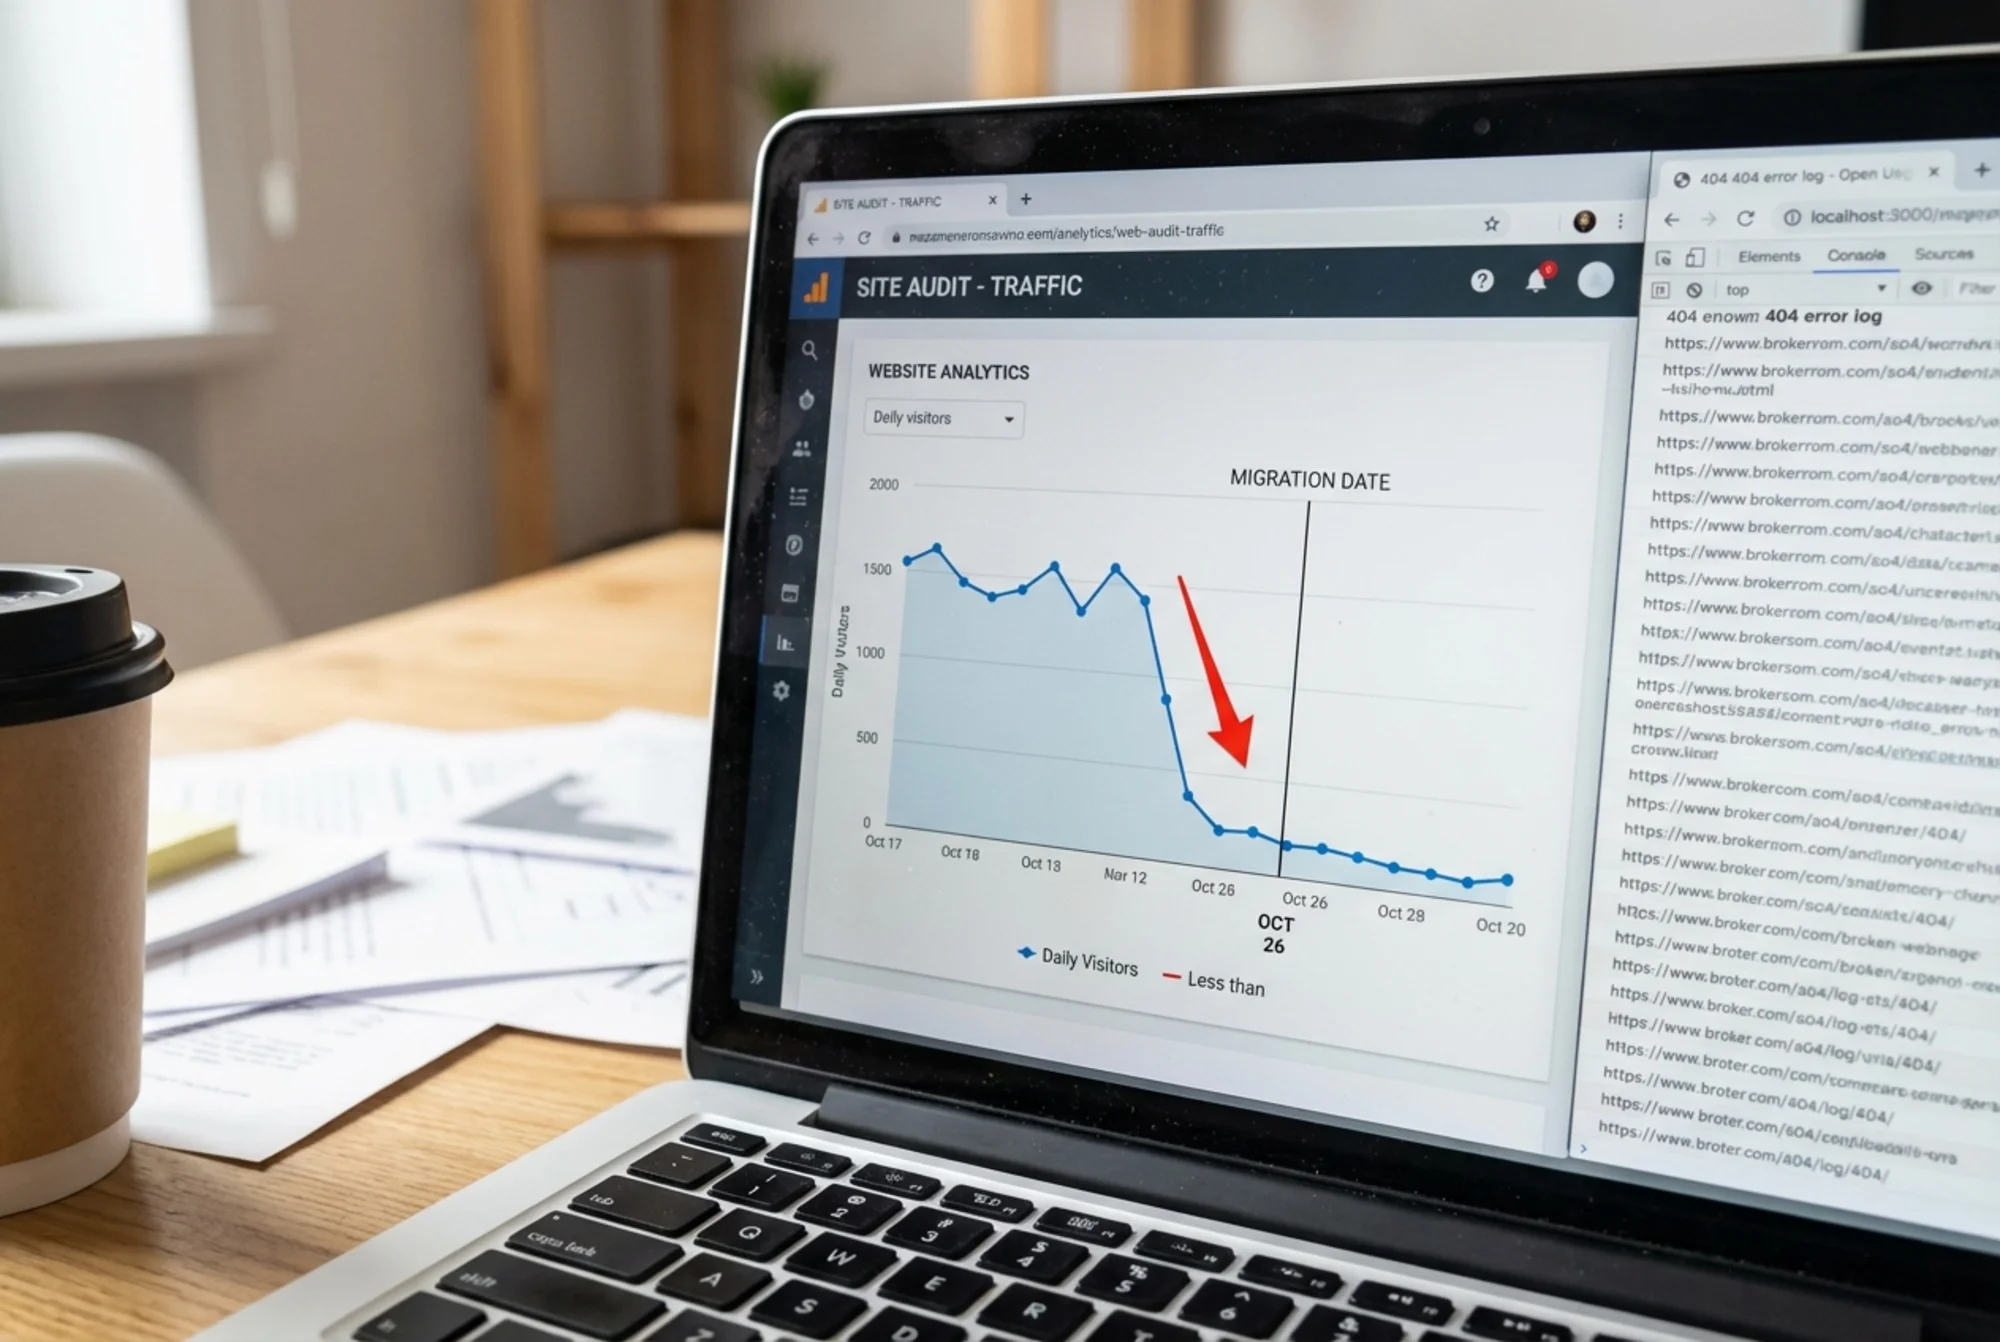
When Google indexes your site, it tracks signals tied to specific URLs: inbound links, click history, crawl frequency, structured data, page speed. When you change platforms or redesign, those signals are attached to addresses that may no longer exist.
Think of it like moving a storefront without forwarding your address. Customers show up at the old location and find a locked door. Google loses trust faster than a customer would.
The three most common causes of post-migration ranking drops:
- Missing or incorrect 301 redirects — Old URLs return 404 errors instead of pointing to the new equivalent page.
- Content changes — The new site uses thinner copy, different headings, or strips out structured data the old site had.
- Technical regressions — The new platform loads slower, has indexability issues, or introduces duplicate content at new URL patterns.
None of these are inevitable. They're just often overlooked.
Before You Migrate: Baseline Everything
You cannot protect what you haven't measured. Before touching the live site, run a full audit of what you currently have. This is your before-state — the document you'll compare against once you go live.
Crawl your existing site
Use any site crawler to map every live URL. The goal is a complete list of:
- Every page URL and its HTTP status code
- Title tag, meta description, and H1 for each page
- Inbound internal links per page
- Approximate word count
If you have 20 pages, this is an afternoon task. If you have 200, it still isn't optional.
Checklist — before migration:
- [ ] Export a full list of live URLs (every page, not just the homepage)
- [ ] Record title tag, H1, and meta description for each page
- [ ] Identify top organic traffic pages (Google Search Console → Performance → Pages, last 90 days)
- [ ] List your highest-ranking keywords and which pages rank for them
- [ ] Export current Core Web Vitals scores (Search Console → Experience)
- [ ] Document all structured data in use (FAQ, LocalBusiness, Article, etc.)
- [ ] Save your current sitemap.xml
Identify your most important pages
Not every page carries equal weight. For most small businesses, three to eight pages drive the bulk of organic traffic: homepage, service pages, a few blog posts, maybe a location page.
Sort your Search Console data by clicks for the past 90 days. Flag your top 10 pages. These get extra attention during the migration — you'll map them first and verify them last.
Build your redirect map
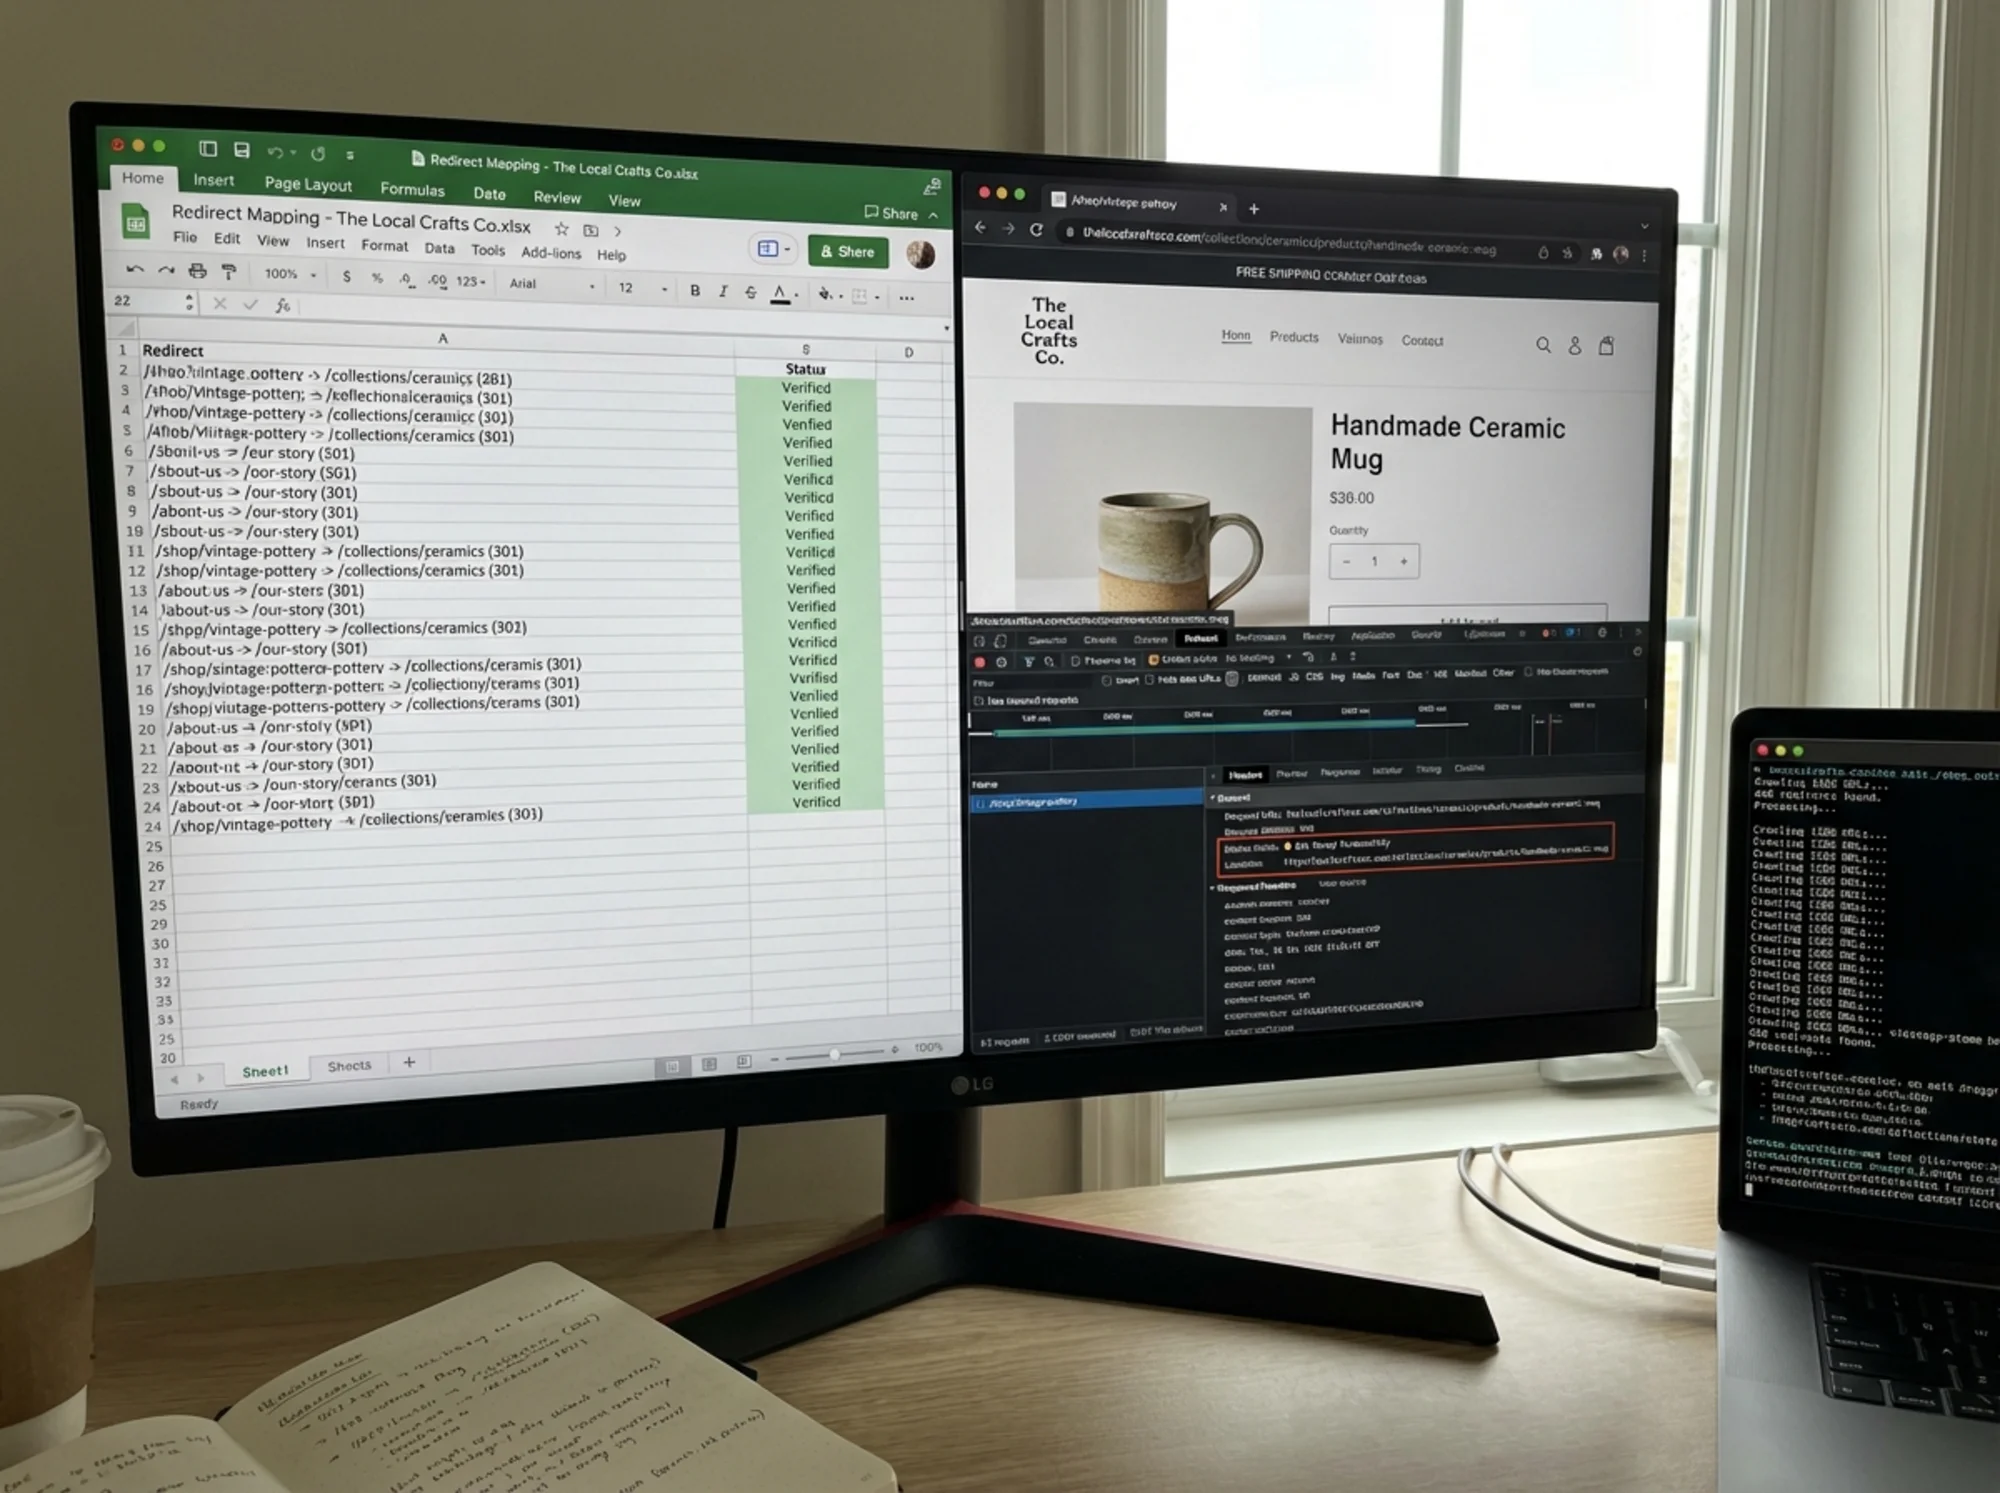
Every URL that's changing needs a 301 redirect to its new equivalent. This is the single most important document in any migration.
Open a spreadsheet. Two columns: old URL, new URL. Work through your crawl export and fill in every page. If a page is being removed with no clear equivalent, redirect it to the nearest relevant page rather than letting it 404.
A common scenario: a plumbing company moves from Wix to Squarespace. Their old service pages lived at /services/drain-cleaning and /services/water-heater-repair. The new site uses /drain-cleaning and /water-heater-repair. Without redirects, every inbound link to the old /services/ path hits a 404 — and all ranking signals attached to those URLs evaporate.
The redirect map is also where you catch URL structure changes introduced by the new platform. WordPress, Squarespace, Wix, Webflow, and Shopify all generate URL patterns differently. Review the new platform's default URL format before you build anything.
During the Migration: Test Before You Publish
This is where most site owners skip steps. The new site looks good in preview. The designer is ready. You want to go live. But staging is where you validate — not after launch.
Test your redirects on staging
Before the domain switch, test your redirect map against the staging environment. Open each old URL and confirm it lands at the correct new URL with a 301 status code — not a 302, not a JavaScript redirect. If you can't test on staging, run through the full list within the first 30 minutes of going live, before Google recrawls.
Verify title tags, H1s, and meta descriptions
Go through every page in your audit doc on the new site and confirm:
- The title tag matches or improves on what you had
- The H1 is present and on-topic
- The meta description is populated
Platforms strip these more often than you'd expect during template migrations or theme changes.
Confirm structured data survived
If your old site used structured data — LocalBusiness, FAQ, Article schema — verify it's present on the new site. Use Google's Rich Results Test on specific pages. Structured data helps Google understand what your business does and can generate enhanced listings in search results. Losing it silently is a real cost.
Check your new sitemap and robots.txt
Generate the new sitemap.xml before launch and review it. It should include every page you want indexed — and nothing you don't (admin pages, duplicate paths, thank-you pages). Submit it to Search Console immediately after going live.
Also check your robots.txt. Staging sites commonly have Disallow: / to block crawlers — confirm that's removed before launch.
Run a speed test
Run the new site through PageSpeed Insights and compare to your baseline. If the new site is significantly slower on mobile, that's a ranking risk to resolve before launch, not after.
Common speed regressions:
- New theme loads more JavaScript than the old one
- Images weren't re-optimized during upload
- Third-party scripts added during redesign (chat widgets, booking tools)
- Fonts loading differently
You don't need a perfect score. You need to not be significantly worse than you were.
Checklist — during migration (staging):
- [ ] Test every redirect in the redirect map (301, not 302)
- [ ] Verify title tag, H1, and meta description on every key page
- [ ] Confirm structured data using Google's Rich Results Test
- [ ] Run speed test and compare to baseline
- [ ] Confirm robots.txt allows crawlers
- [ ] Verify canonical tags are correctly set
- [ ] Crawl staging site for unexpected 404s or redirect chains
A Specific Walkthrough: Moving from WordPress to Squarespace
Here's how this plays out in practice: a boutique fitness studio moving from WordPress to Squarespace.
Before migration:
The studio crawls their WordPress site and finds 34 live pages. Their top organic traffic pages are the homepage, the class schedule page, and two blog posts — beginner yoga and prenatal fitness. Their WordPress URLs follow the default format: /blog/prenatal-yoga-tips/ and /blog/yoga-for-beginners/. Together, these two posts drive 60% of organic visits.
Building the redirect map:
Squarespace generates blog URLs without trailing slashes: /blog/prenatal-yoga-tips. Close, but not identical. The class schedule page was renamed from /schedule to /classes. The redirect map covers all 34 pages.
Staging check:
Testing reveals the "Contact" page has a blank title tag — the template didn't pull it in. Fixed. Their LocalBusiness schema from a WordPress plugin also didn't migrate. They manually add it via Squarespace's Code Injection header. A speed test shows the new site is slightly faster on mobile due to a lighter theme.
After launch:
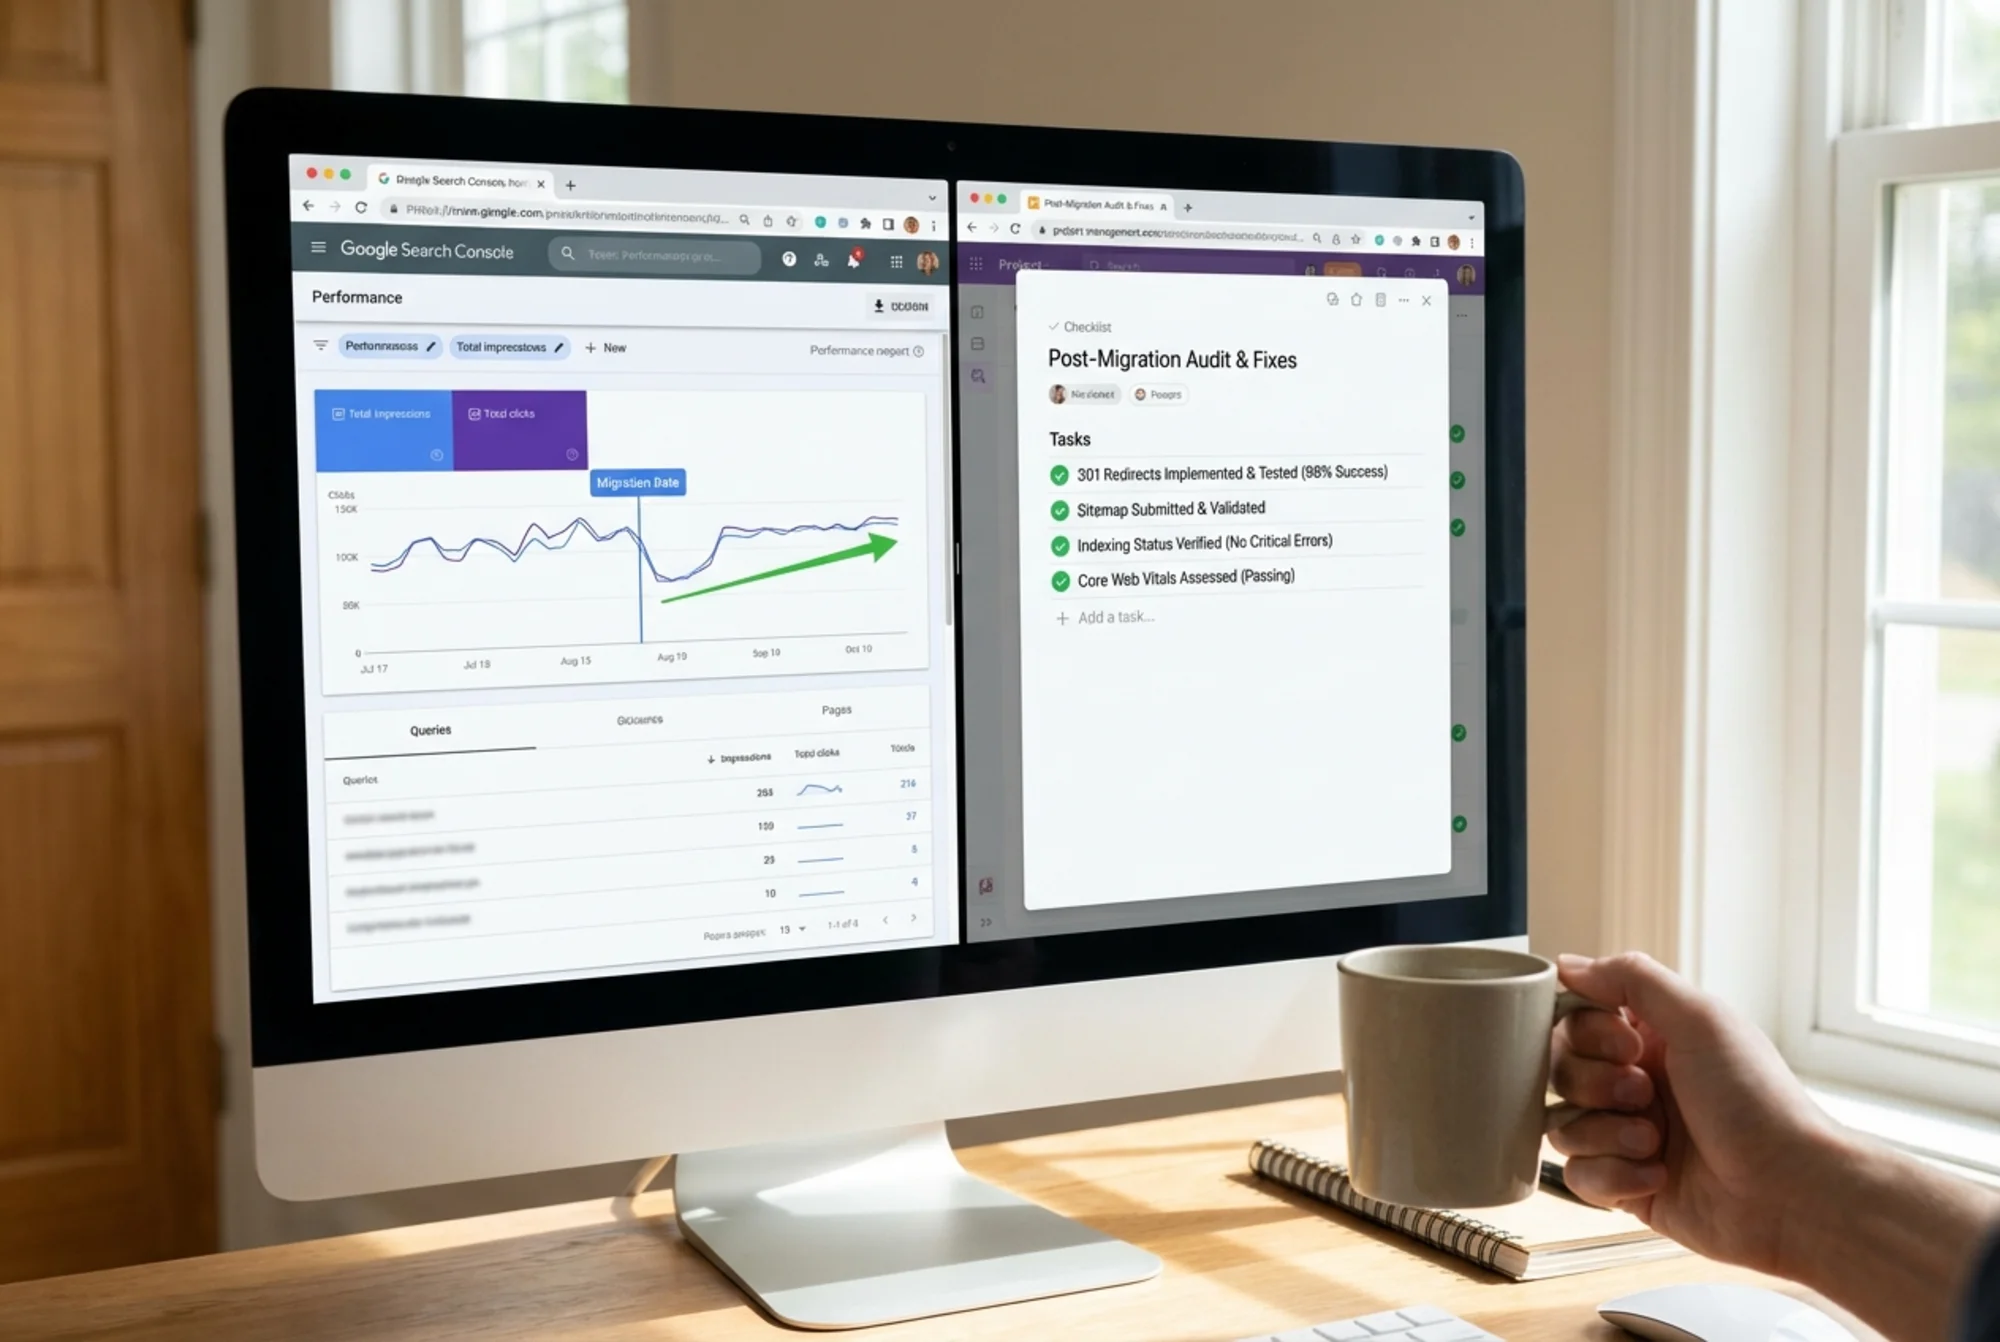
They flip DNS, submit the new sitemap to Search Console, and run through the post-launch checklist. Within 48 hours, all 34 redirects are confirmed resolving correctly. Rankings hold steady over the following two weeks.
After You Launch: Verify, Then Watch
Going live is not the finish line. The first two weeks are critical.
Day 1 post-launch checklist
- [ ] Submit updated sitemap.xml to Google Search Console
- [ ] Request indexing for your top 5 pages via URL Inspection tool
- [ ] Test all redirects again from the live domain
- [ ] Confirm robots.txt allows crawlers on the live site
- [ ] Verify analytics tracking is firing (real-time pageviews should be visible)
- [ ] Crawl the live site for any 404s not caught in staging
Weeks 1–2: Monitor for signals
Check Google Search Console daily in the first two weeks. Look at:
- Coverage — Are pages being indexed? Are there new errors?
- Performance — Are impressions and clicks holding relative to baseline?
- Core Web Vitals — Are scores stable or improving?
A small temporary dip in rankings is normal — Google needs time to recrawl and re-evaluate. A dip lasting more than three to four weeks, or a significant drop (more than 20–30% of impressions), usually signals something broke.
What to do if rankings drop
First, recheck your redirects. The most common cause is a redirect that was set up incorrectly or missed. Use Search Console's Coverage report to see which URLs are returning errors.
Second, compare key page content. Is the new version thinner than the old? Are target keywords still present in headings and body copy? Did the redesign remove important context?
Third, check crawlability. Run a crawl of the live site and look for blocked resources, redirect chains longer than two hops, or pages that are inadvertently noindexed.
The Audit Is the Insurance Policy
Businesses that lose rankings during migrations almost always skipped the audit phase. They trusted the designer. They assumed the platform handles SEO automatically. They launched without a baseline to compare against.
Running a site audit before you migrate gives you a snapshot of everything Google currently values about your site. Running one after gives you the ability to pinpoint exactly what changed. Without both, you're guessing.
Run a free website audit with FreeSiteAudit to get a complete picture of your site's technical health, page-level issues, and SEO signals before any major site change.
Quick Reference: Full Migration Audit Checklist
Before:
- [ ] Crawl existing site, export all URLs and status codes
- [ ] Record title tags, H1s, meta descriptions for every page
- [ ] Export Search Console performance by page (top 10 pages, last 90 days)
- [ ] Build redirect map (old URL → new URL)
- [ ] Document structured data in use
- [ ] Baseline Core Web Vitals scores
- [ ] Save current sitemap.xml
During (staging):
- [ ] Test every redirect (301, not 302 or JS redirect)
- [ ] Verify title tags and H1s on every page
- [ ] Confirm structured data survived (use Rich Results Test)
- [ ] Run speed test and compare to baseline
- [ ] Confirm robots.txt allows crawlers
- [ ] Verify canonical tags
- [ ] Crawl staging site for unexpected 404s
After (launch):
- [ ] Submit new sitemap to Search Console
- [ ] Request indexing for top pages via URL Inspection
- [ ] Test all redirects on the live domain
- [ ] Verify analytics tracking is active
- [ ] Monitor Search Console daily for 2 weeks
- [ ] Crawl live site for errors within 48 hours
Sources
- Google Search Central — Creating helpful, reliable, people-first content: https://developers.google.com/search/docs/fundamentals/creating-helpful-content
- Google web.dev — Core Web Vitals: https://web.dev/articles/vitals
- Google Search Central — Article structured data: https://developers.google.com/search/docs/appearance/structured-data/article
Check your website for free
Get an instant score and your top 3 critical issues in under 60 seconds.
Get Your Free Audit →